|
 11 August 2008, 23:28
|
#81 |
|
Registered User
Join Date: Jun 2008
Location: planet earth
Posts: 1,115
|
posted this on another thread, but here it fits too, just in case, someone is looking for some visuals:
Lead-Free SOIC 20 Installation | B.E.S.T Corporation [ Show youtube player ] some more tutorials you'll find in "related videos". |

|
|
23 August 2008, 23:58
|
#82 |
|
Needs a life
Join Date: Jan 2008
Location: England
Posts: 1,707
|
I bought an AOYUE 738 from buyaoyue.com and got what I considered a very good deal. Service was great - the unit arrived in 2 days - and it's a superb piece of kit.
Now looking for things to practise on prior to butchering the 4000 
|
|
|
|
25 August 2008, 05:46
|
#83 |
|
Turpentine
Join Date: Oct 2007
Location: Kent, United Kingdom
Posts: 744
|
Hi,
I can advise you to not solder any 680xx directly. Although some people do it, it's not good practice as the heat quickly travels the legs and can either damage the processor or shorten it's life. This is a Kickstart IC but the 68000 shouldn't be soldered the same way:  Ideally they should be used in conjuction with a DIL (Dual In Line)socket:  The later 68000 series was surface mount and these chips are designed with SMT (Surface Mount Technology) in mind and the different way the heat is applied. Even SMT variants are nonetheless socketable using a PLCC (Plastic Leaded Chip Carrier)socket. Using a socket whether PTH (Plated Through Hole) or SMT also has the advantage of being an easy,quick and solderless exercise. You will also save damage and wear and tear of your motherboard by not soldering and de-soldering only having to place the socket once. Last edited by Eclipse; 31 August 2008 at 01:11. |
|
|
|
25 August 2008, 10:09
|
#84 |
|
Likes to be thought of as
Join Date: May 2008
Location: Kent,UK
Age: 55
Posts: 529
  |
Here is a good tip for you all, NEVER SETUP YOUR SOLDER IRON ON THE FLOOR!
When i was young and living with my parents, I used to do a lot of soldering on the floor next to the only empty plug socket in the house. This was in the kitchen next to the fridge (Mother loved it). I Plugged in the soldering iron and left it to warm up, went to get myself a coffee. Then went to the Fridge to get some milk, opened the fridge door stepped on something really cold or so i thought! when i went to step away i had a hot soldering iron melted into my foot, still have the groove in it! It was so hot i thought it was something cold from the fridge and didn't bother to take my foot away! but when i removed my foot from the iron that's when it started to hurt! And it hurt bad for weeks. Its funny but i never new what i had done until i smelt the burning flesh. So always put the soldering iron in a stand on a table were it wont get knocked over. Burns can take a long time to heal. |
|
|
|
25 August 2008, 20:39
|
#85 | |
|
Turpentine
Join Date: Oct 2007
Location: Kent, United Kingdom
Posts: 744
|
Quote:
|
|
|
|
|
12 September 2008, 21:08
|
#86 | |
|
PSPUAE DEV
Join Date: Nov 2006
Location: Wales / UK
Age: 45
Posts: 5,999
 |
Quote:
 . Best of all the piece of crap didnt even work, cause the IC's were always glued to the board. . Best of all the piece of crap didnt even work, cause the IC's were always glued to the board.I remember the sales guy demonstrating it to us and he ended up burning a hole in the board, awesome way to sell a desolder station. Alas the Desoldering Station was destroyed the stupid work experience kid, who decided he would rather burn holes in the bench, what a silly boy. If I remember correctly the bench caught fire and set off all the fire alarms. |
|
|
|
|
13 September 2008, 01:22
|
#87 |
|
Likes to be thought of as
Join Date: May 2008
Location: Kent,UK
Age: 55
Posts: 529
|
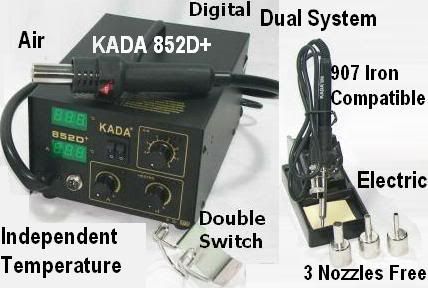
I have one of these, they are great, well worth the money and more
|
|
|
|
13 September 2008, 06:45
|
#88 |
|
Registered User
Join Date: Jul 2008
Location: Nowhere
Posts: 74
|
Never, never, never use a 25W iron with a big tip to solder a PS2 modchip. I spent 5 hours tonight installing it and I will never repeat the experience

|
|
|
|
13 September 2008, 11:04
|
#89 | |
|
PSPUAE DEV
Join Date: Nov 2006
Location: Wales / UK
Age: 45
Posts: 5,999
|
Quote:
.
|
|
|
|
|
13 September 2008, 19:33
|
#90 |
|
. . Mouse . .
Join Date: Jun 2005
Location: Nowhere
Age: 55
Posts: 1,792
|
Desoldering question:
After many years of modding computers with power tools for the last few months I've been doing soldering in a small / semi-competent way... ...Among the things I bought from Amigakit a few days ago was a 60mhz dil-8 oscillator + a couple of matching sockets. Now, the job is neatly done even though I say so myself but it took ages & I wonder if there is a better way - especially given the 'technique' I used would never work on a package with more than 4 pins. Also the process seems to have killed the original 50mhz oscillator... What I did: -Apply soldering iron to each pad in turn. Melt solder & suck away as much as possible. ->This did not free any of the pins, just less solder. -Next I gently pushed a flat-head screwdriver in between PCB & oscillator. While giving that a gentle twist I used the iron to repeatedly remelt the solder on each pin in turn & sort-of walked it out of the PCB. ->Nice 'n neat, no PCB damage, but took quite a while & I suspect the repeated heating is what killed the old oscillator. -Insertion of the dil-8 socket was a reversal of that process. Nice result, no damage, but took a while. ->60mhz oscillator plugged into that. As it's much smaller than my Blizzard '060 this 'practice' was done with the ARM3 upgrade card for my A3000 as it's size made it easier the handle... ...compared to Blizzard boards these cards are like rocking-horse poo - so no pressure then!  I'm glad to say it's still working, and a bit faster for the new oscillator. I can't help feeling there's a better way that's less likely to result in dead components. Back to Amigakit for an oscillator for my Blizzy... Thoughts? Thanks. FYI: -My intention is only to mildly overclock my Blizzy 'because I can' as it's got an old '060 in it which may be prone to cooking - Also I don't want the SCSI card to pack up. -My ARM 3 is a 25mhz jobbie now running @ 30mhz. Again a bit conservative but as my card has an FP10 FPU which don't like too much overclocking & are again like rocking-horse poo compared to standard ARM3 upgrade boards...  -An ARM3 is very roughly as fast per clock as an 060... Last edited by Charlie; 13 September 2008 at 19:39. |
|
|
|
13 September 2008, 20:49
|
#91 |
|
Ya' like it Retr0?
Join Date: Jul 2005
Location: United Kingdom
Age: 49
Posts: 9,768
|
@Charlie
Desoldering Through Hole components can be tricky, more so pending on the type of solder, some of that lead free stuff is an absolute arse to heat properly. i have a few methods of attack, first is to cover the component leads in plumbers flux, (this is more caustic than battery acid if left so CLEAN AFTER USE!!!) I dip the solder wick / mop in plumber flux also, using a HOT iron (around 320-380c) and tap for 2 seconds each lead with the solder mop in between the iron tip and component lead. the other method i use can be a little more dangerous if you are not use to hot air, so practice on JUNK first as bunring boards is NOT a good thing.. again cover the area in plumbers flux paste (again this stuff is EVIL if left uncleaned but the results are worth the effort) using hot air (around the 360c mark with low air flow) gently circle the area for a few minutes untill the flux begins to smoke, at this point you know the solder is ready to be sucked up... again, keep the hot air nozzle moving, if you stall and concentrate on the sucking its likely you will blister the board. finally the last method can be anyone of these, but having the board on its side and adding a small amount of pressure, gently pulling the component away from the otherside. again ALWAYS CLEAN the board if you use a caustic flux paste or you wont have a working board in the morning!!! *ahem*
|
|
|
|
13 September 2008, 21:45
|
#92 |
|
. . Mouse . .
Join Date: Jun 2005
Location: Nowhere
Age: 55
Posts: 1,792
|
Thanks Zetr0. |
|
|
|
14 September 2008, 14:43
|
#93 | |
|
PSPUAE DEV
Join Date: Nov 2006
Location: Wales / UK
Age: 45
Posts: 5,999
|
Quote:
|
|
|
|
|
14 September 2008, 15:42
|
#94 |
|
. . Mouse . .
Join Date: Jun 2005
Location: Nowhere
Age: 55
Posts: 1,792
|
I've just found out something very interesting:
My mother-in-law of all people is d*mn good with a soldering iron!  It seems a few years ago a lot of housewives made a bit of extra money by making up PCB's @ home for electronics companies... ...Looks like I've got someone to help me out with the tricky stuff & hopefully some hands-on teaching too. You never know, I may even get good @ this myself. |
|
|
|
14 September 2008, 18:59
|
#95 | |
|
PSPUAE DEV
Join Date: Nov 2006
Location: Wales / UK
Age: 45
Posts: 5,999
|
Quote:
All I learnt from my mother was, ironing, cooking, cleaning, knitting and sowing, . I could knit an awesome santa for the christmas tree decs, .
|
|
|
|
|
20 September 2008, 15:36
|
#96 |
|
. . Mouse . .
Join Date: Jun 2005
Location: Nowhere
Age: 55
Posts: 1,792
|
Well, my mother-in-law has been round for my first lesson - it was a short one... ...one of those: 'you'll never get anywhere with that stuff' conversations. So off to eBay for some better equipment. |
|
|
|
20 September 2008, 16:14
|
#97 | |
|
PSPUAE DEV
Join Date: Nov 2006
Location: Wales / UK
Age: 45
Posts: 5,999
|
Quote:
. Im sure zetr0 will give you some ideas on some nice equipment.
|
|
|
|
|
20 September 2008, 18:02
|
#98 | |
|
Ya' like it Retr0?
Join Date: Jul 2005
Location: United Kingdom
Age: 49
Posts: 9,768
|
Quote:

|
|
|
|
|
23 September 2008, 00:02
|
#99 |
|
. . Mouse . .
Join Date: Jun 2005
Location: Nowhere
Age: 55
Posts: 1,792
|
Glad to amuse. How about this?
[ Show youtube player ] Now I know how to remove surface mount components without the aid of hot air... ...my next question: I have two double-sided 72pin 128mb simms - both have blown the same two chips, so I'm thinking here's a chance for a bit of practice... ...remove the damaged chips from both, then cannibalise one of the simms for a couple of good chips to repair the other. If I make a Horlicks of it I've lost nothing, if it works I get one of my 128mb simms back. Now, being double-sided simms the above trick isn't going to work, and the SM chips are the type where the pins are folded under the package... ...how-in-the-h*ll do you remove them with just the standard equipment when you can't get at the solder pads? ie: iron, solder, wick, flux-pen. Is there a 'dirty-trick' like the above clothes iron link..? I'm not after perfection here - if it works I'm happy. I've seen a 'trick' where you deliberately bridge all the pins with solder, melt solder, then lift one side @ a time... ...very messy & would that work for longer packages? Oh, yes - how do you re-solder such chips with 'folded-under' pins? Splash on a load of solder then wick-out the bridges? There must be a better way... Last edited by Charlie; 23 September 2008 at 00:10. |
|
|
|
23 September 2008, 01:03
|
#100 |
|
Ya' like it Retr0?
Join Date: Jul 2005
Location: United Kingdom
Age: 49
Posts: 9,768
|
@Charlie
ahhh the Iron Hot plate, i know this technique VERY well... i use it regularly in reworking dead boards.... its so damn easy and quick... although I also use flux and hot air on the top as well... much quicker / smother now... to get at those types of components... stop torturing yourself... you need HOT AIR, if you dont wanna splash out on a Hot Air Rework station, then I suggest you borrow some ones Paint strippers and Fab yourself a small nozzle using a coke can or something (thank merlin its his baby )once you have had / used hot air..... there is no substitute my friend... |
|
|
| Currently Active Users Viewing This Thread: 1 (0 members and 1 guests) | |
| Thread Tools | |
 Similar Threads
|
||||
| Thread | Thread Starter | Forum | Replies | Last Post |
| Amiga gfx mode, i need some hints... | Raislin77it | Coders. General | 2 | 01 March 2013 18:21 |
| Hints on restoring mouseball appreciated.. | Turran | support.Hardware | 6 | 25 June 2012 16:10 |
| Hints for an AROS machine | jman | Amiga scene | 4 | 14 December 2011 20:08 |
| Hints from within the GUI | AmigaBoy | request.UAE Wishlist | 13 | 25 April 2007 18:07 |
| I need GVP HD8+ hints | utri007 | support.Hardware | 1 | 01 March 2007 03:51 |
|
|