
|
 25 August 2010, 13:56
|
#1 |
|
Professional slacker!
Join Date: Jul 2009
Location: Kent, UK
Age: 44
Posts: 6,683
 |
External HxC Case/Enclosure Project!
Hi!
I've decided against cutting up my *mint* A600 so I've bought one of these: http://cgi.ebay.co.uk/ws/eBayISAPI.d...=STRK:MEWAX:IT And I've bought some 3mm clear Perspex from an ebay seller who has cut it to the right sizes for me, £3.50 inc P&P.  That just leaves me to drill holes for the buttons/cables, file a slot for the SD Card, mount the screen and glue it all together.  Hopefully the FDD gubbins' arrive today as they were posted Monday, so want to make a start with the plans on this. Anyone know what sort of buttons I need? I can leave a gap on the ftont as a temp stop gap to use the built in buttons but would like to mount the screen and buttons on the front idealy. I understand external buttons can be soldered to the PCB. I've attached a basic plan of my idea... |

|
|
25 August 2010, 16:26
|
#2 |
|
uber cool demi god
Join Date: Jun 2006
Location: Kent/England
Posts: 2,073
|
Good luck with this project Steve.
Couldn't you retr0bright an A600 yellowed case and have it integral? Integral would look much more awesome. Still, this is an awesome project anyway.
|
|
|
|
25 August 2010, 16:31
|
#3 | |
|
Professional slacker!
Join Date: Jul 2009
Location: Kent, UK
Age: 44
Posts: 6,683
|
Quote:
Oh and I'm not allowed to play with Chemicals 
|
|
|
|
|
25 August 2010, 16:39
|
#4 | |
|
uber cool demi god
Join Date: Jun 2006
Location: Kent/England
Posts: 2,073
|
Quote:

|
|
|
|
|
26 August 2010, 18:48
|
#5 |
|
Professional slacker!
Join Date: Jul 2009
Location: Kent, UK
Age: 44
Posts: 6,683
|
Well the bits arrived, I hooked them up to my A600. it works and disks start to load as far as the crack into then they won't load any further, I'm guessing this is to do with booting from DF1.
So I guess I'll need to trick miggy into thinking DF1 os DF0  Something to mess about with over the weekend... |
|
|
|
26 August 2010, 19:28
|
#6 |
|
Phone Homer
Join Date: Jun 2006
Location: 5150
Posts: 5,775
|
Hardly any games will run from DF1:
saxabar put in a switch so he could keep his internal drive and conect the HxC externaly, something to do with pin 15 and 16 -If you do this could you maybe give some info or take a photo. http://eab.abime.net/showthread.php?t=50583 |
|
|
|
26 August 2010, 21:28
|
#7 | |
|
Professional slacker!
Join Date: Jul 2009
Location: Kent, UK
Age: 44
Posts: 6,683
|
Quote:

|
|
|
|
|
27 August 2010, 11:20
|
#8 |
|
Professional slacker!
Join Date: Jul 2009
Location: Kent, UK
Age: 44
Posts: 6,683
|
Just an update really, the system works fine as I managed to get some games (Like IK+) to work
 So I'll look at the switch mod, but first I'm going to start to make my enclosure. Pics to follow over the weekend... Oh... I actually have another question for the Guru's  There is an earthing point on the power/connector cable that I guess is supposed to connect to part of the external drive casing. However using a perspex case I wont have an earthing point. Seems to work without being earthed but is there going to be any problems? Cheers! |
|
|
|
27 August 2010, 21:27
|
#9 |
|
Professional slacker!
Join Date: Jul 2009
Location: Kent, UK
Age: 44
Posts: 6,683
|
Hey Guys!
Here's some pics of the prototype Its just put together with a few blobs of hot glue for now, I need to work on the front/back and buttons/screen. 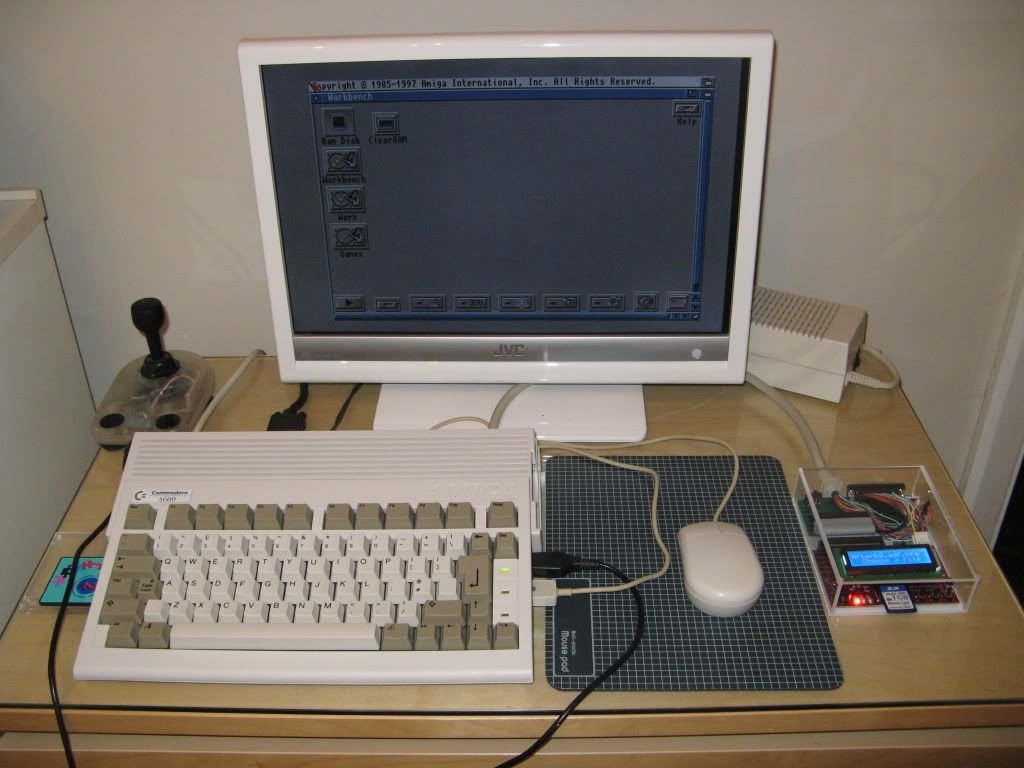 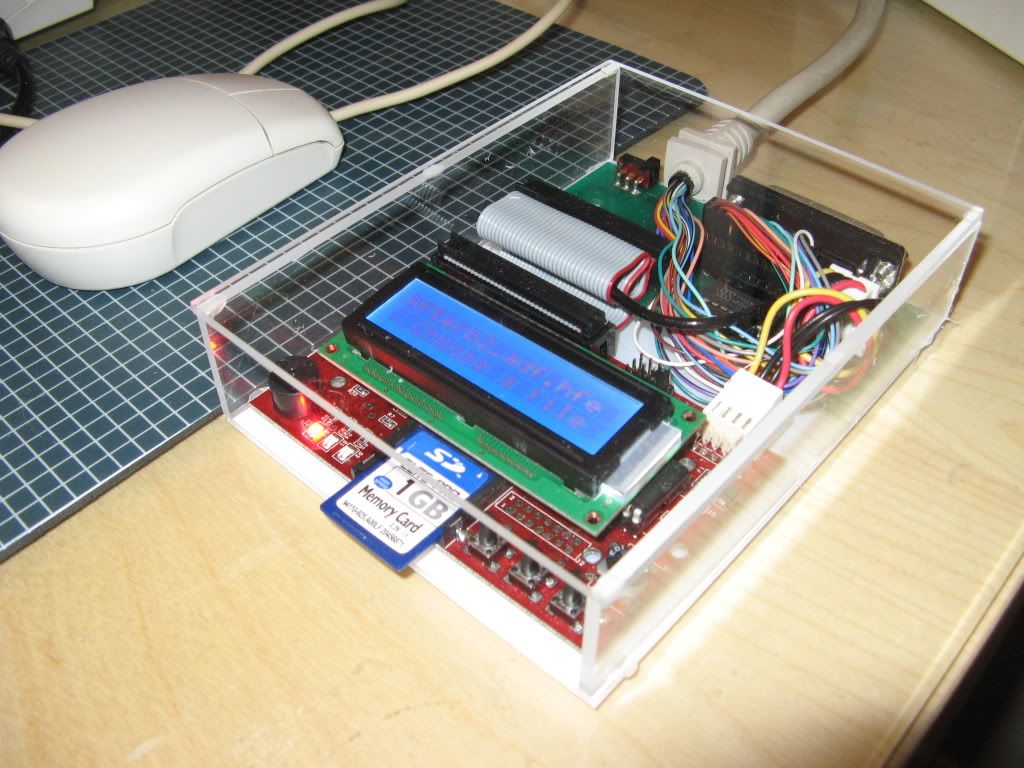 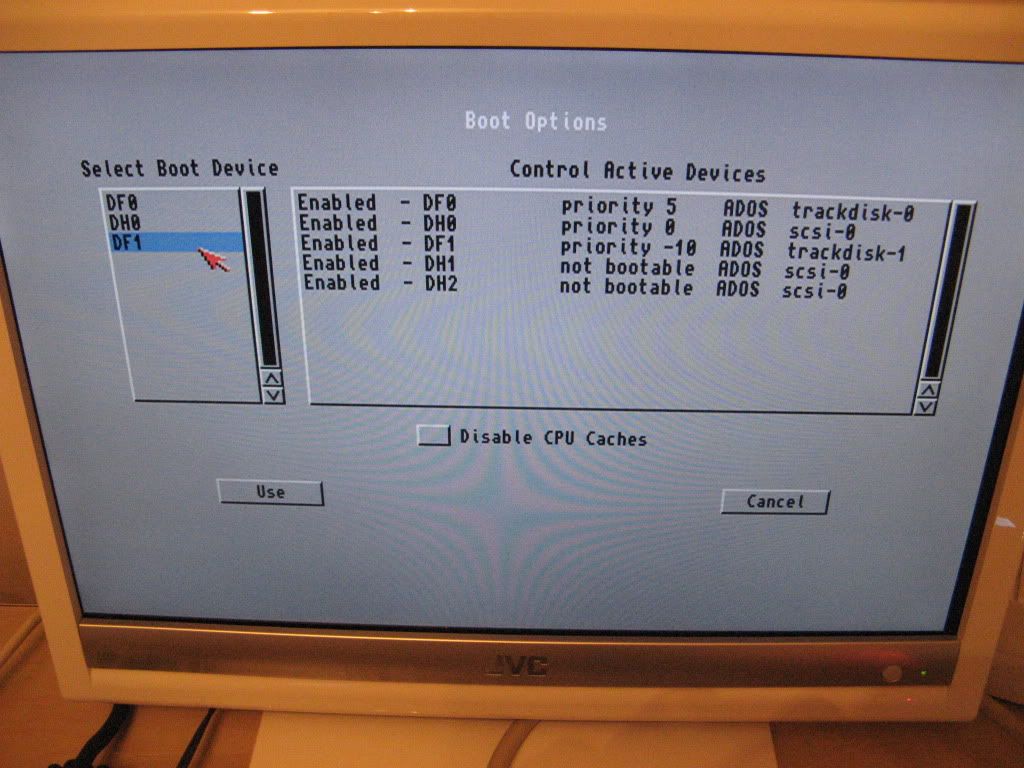 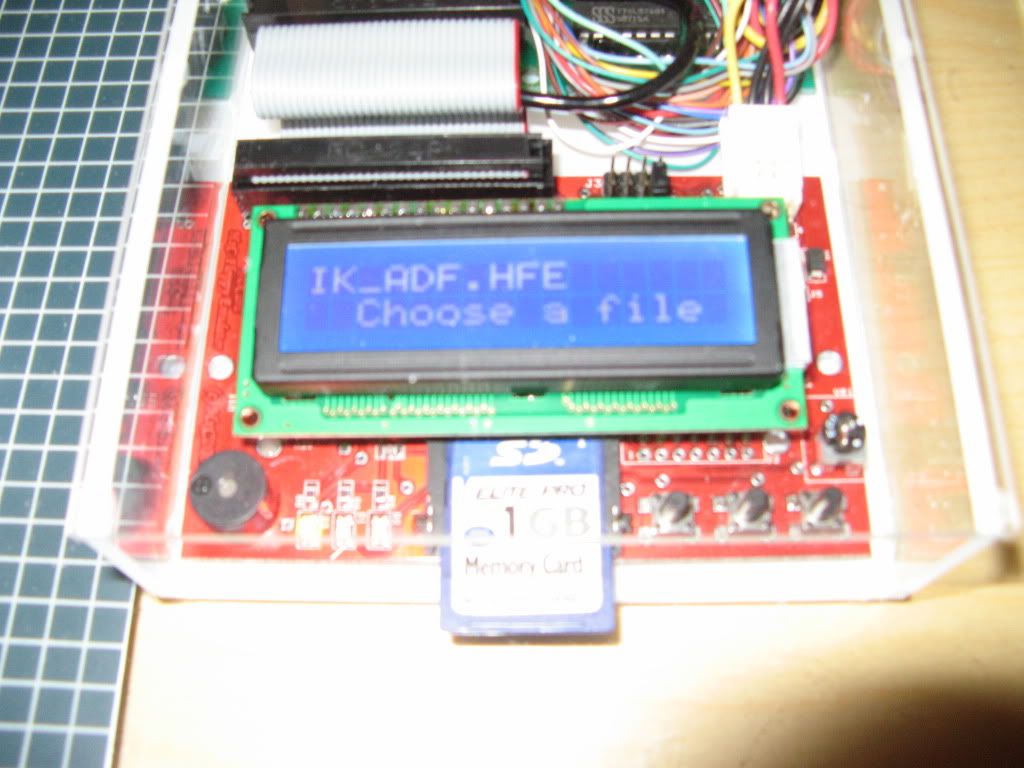 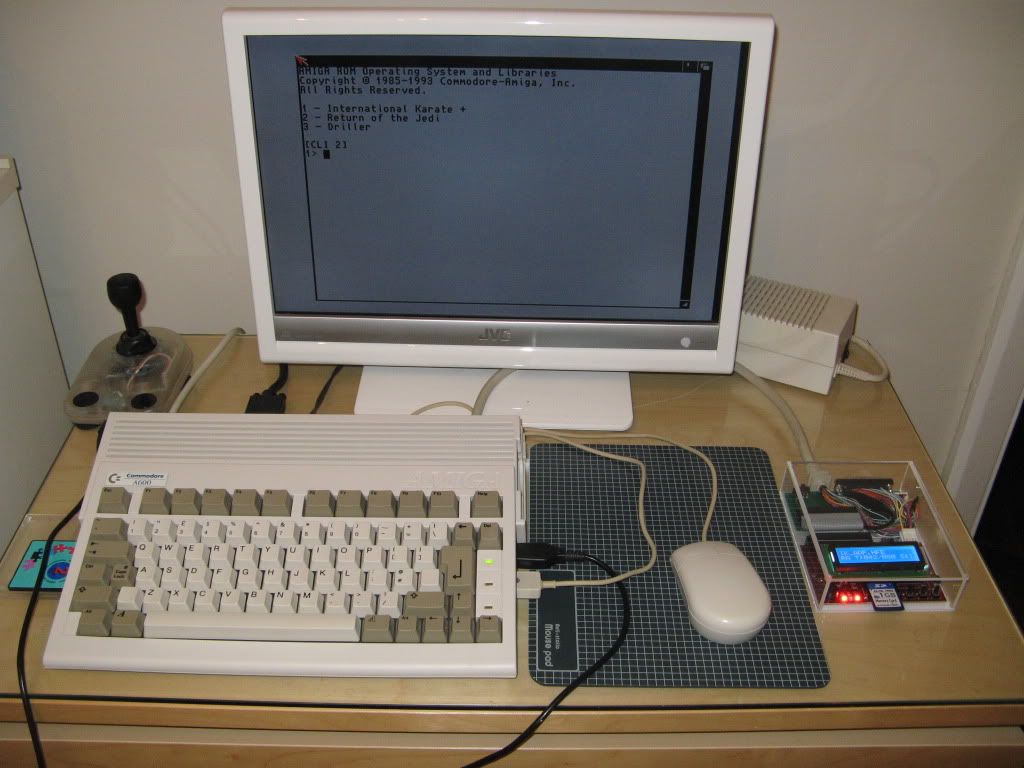 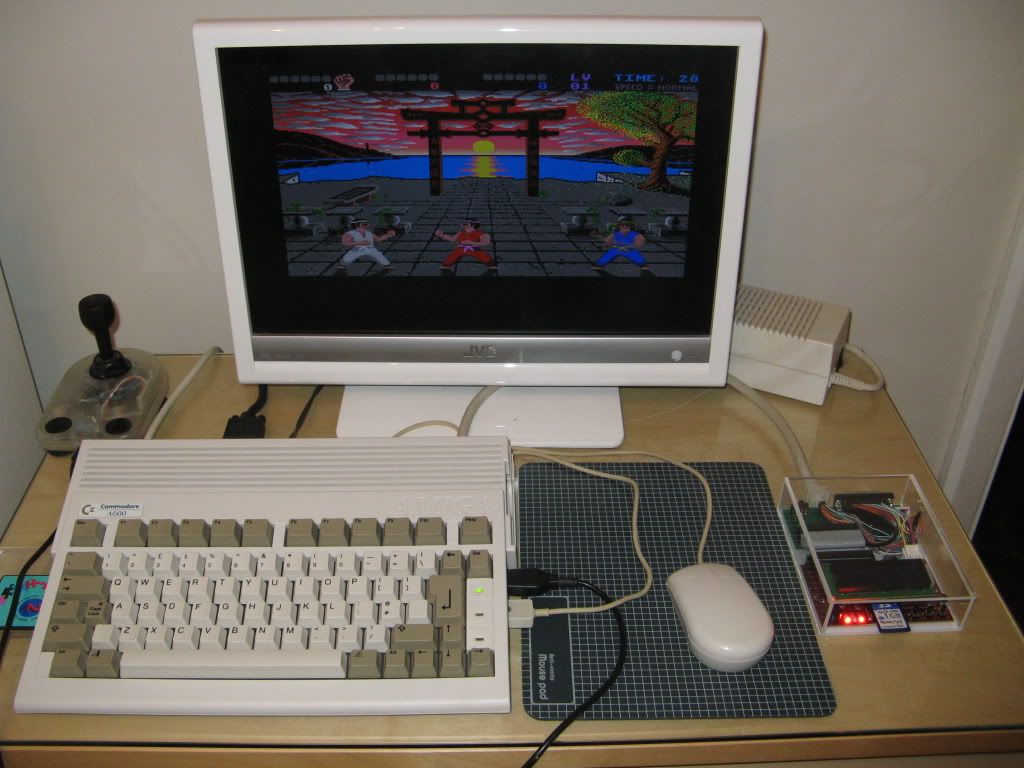
|
|
|
|
27 August 2010, 21:46
|
#10 |
|
Junior Member
Join Date: Sep 2001
Location: No(R)Way
Age: 41
Posts: 3,200
|
Thats really cool man, the transparent box really make it stand out !!!
|
|
|
|
27 August 2010, 22:02
|
#11 | |
|
Global Moderator
Join Date: Aug 2008
Location: Sidcup, England
Posts: 10,300
|
This is a very interesting project, Steve!
You're making great progress already. Make sure you give us all the boring details to go with the pics so we can follow your lead...  Quote:
Last edited by prowler; 27 August 2010 at 22:08. |
|
|
|
|
27 August 2010, 23:33
|
#12 |
|
Professional slacker!
Join Date: Jul 2009
Location: Kent, UK
Age: 44
Posts: 6,683
|
Thanks Prowler, well there really isn't much to tell
I connected it all up and it just works! I need to look into the DF0&DF1 swap so I'll defo post more on that  I only used small blobs of hot glue for now so to hold it all together, I was pleased with the cuts on the Perspex and its all the correct sizes. No issues with the earthing... I've made a little demo Video for my Youtube page: [ Show youtube player ] Enjoy! |
|
|
|
28 August 2010, 00:19
|
#13 |
|
Zone Friend
Join Date: Jul 2005
Location: Toronto, Canada
Posts: 734
|
Where can you get one of those toys. I wouldn't mind icking up one or three or so.
|
|
|
|
28 August 2010, 00:26
|
#14 | |
|
Professional slacker!
Join Date: Jul 2009
Location: Kent, UK
Age: 44
Posts: 6,683
|
Quote:
Here is the info you need http://www.torlus.com/floppy/ Have a good read of the forums and such. Enjoy! |
|
|
|
|
28 August 2010, 00:43
|
#15 | |
|
Registered User
Join Date: Sep 2008
Location: Paris / France
Posts: 656
|
Very nice box !
I will keep some pictures for the project page :-) To inform every HxCFE+Amiga users : Quote:
(Amstrad CPC version : [ Show youtube player ]) |
|
|
|
|
28 August 2010, 12:18
|
#16 |
|
Professional slacker!
Join Date: Jul 2009
Location: Kent, UK
Age: 44
Posts: 6,683
|
Thanks Jeff, you're welcome to use the pics, very interesting with the Write support
Cheers, Steve. |
|
|
|
29 August 2010, 11:49
|
#17 |
|
The 1 who ribbits
Join Date: Apr 2006
Location: leek, Staffs, UK
Age: 56
Posts: 3,557
|
me giggles, steve with soldering iron, Zetro plz take Pics
|
|
|
|
29 August 2010, 21:44
|
#18 |
|
WipEout Fanboi
Join Date: Apr 2010
Location: Ringsted / Denmark
Age: 48
Posts: 263
|
Fab project Steve
It looks really cool with all the bits on show. You've given me the idea to get myself a HxC thingy at some point and I think it will be in a similar External fashion. I like the idea of being able to use it on multiple Amiga's if need be. I've got an old floppy drive that has gone bad head wise, but the interface and wires etc are all still good so I could probably butcher that
|
|
|
|
09 September 2010, 21:07
|
#19 |
|
Registered User
Join Date: Jul 2006
Location: Colchester Essex
Age: 44
Posts: 822
|
Wow only just seen this. Awesome job Steve. I want one of these now
|
|
|
|
13 December 2010, 15:24
|
#20 |
|
Ruler of the Universe
Join Date: Mar 2010
Location: Lanzarote/Spain
Posts: 6,189
 |
Hi:
With Fitzsteve permission I want to show mine here. On saturday I received my HxC and I've made my own style clear enclosure. It's made to size and I changed the buttons it had and the ribbon cable connector and I put an angled one to avoid having to put more cables inside. For the buttons I've made 3 longs rods, and for the Sd, an slot. So it has all the sides on and it's finished. http://img819.imageshack.us/img819/5026/abcd0020uk.jpg Fitzsteve you say "The irony is that now the ACA630 is comming out with a simple jumper switch to make external FDD (or the HxC) DF0 it would have done what I wanted and maybe I wouldn't have sold it ". Do you know if the ACA1230 will have the same option? |
|
|
| Currently Active Users Viewing This Thread: 1 (0 members and 1 guests) | |
| Thread Tools | |
 Similar Threads
|
||||
| Thread | Thread Starter | Forum | Replies | Last Post |
| Possible to use HxC in external drive? | diablothe2nd | support.Hardware | 10 | 24 April 2013 23:15 |
| A500: HxC as external DF0 drive | Hoopz | support.Hardware | 1 | 07 April 2013 22:59 |
| Transparent External Enclosure for HxC Floppy Emulator for CDTV | CDTV1991 | support.Hardware | 9 | 07 February 2012 22:03 |
| HXC Floppy emulator and external port | acadiel | Hardware mods | 6 | 10 March 2010 21:14 |
| WTB external CDrom or scsi enclosure for A3000 | roguebeck | MarketPlace | 2 | 05 October 2007 23:51 |
|
|


